Remember when folks had to carefully pick out every part of a background from pictures? That was tricky and took a long time! But now, thanks to Artificial Intelligence (AI), you can easily and quickly remove backgrounds from images and videos.
This new technology is fantastic for people who love to take photos, design incredible images, or make fun videos. With AI tools, photographers can create beautiful portraits with just the person in the picture; designers can make clean, eye-catching designs, and video makers can add fantastic effects.
In this article, we’ll talk about the AI Smart Cutout tool in Wondershare Filmora and what makes this great, and we’ll look at its features. Plus, we’ll share critical things to consider in the smart cutout tool, so you use them like a pro!
Part 1: Key Things to Consider in an AI Cutout Tool
When choosing an AI video cutout tool to help you cut out parts of an image or video, here are some essential things to think about:
Experience of Using it:
- Simple Design: Pick a tool with easy-to-understand buttons and labels, especially if you’re new to design.
- Drag-and-Drop: Some tools let you easily drag pictures or videos into the work area, which saves time.
- Helpful Guides: Look for tools with clear instructions or tutorials to help you learn quickly.
Accuracy:
- Good at Finding Edges: The tool should be good at finding the edges of the object you want to cut out, especially with tricky parts like hair.
- Works with Different Images: Make sure it works with many images, like JPEG, PNG, and even complicated backgrounds.
- Adjustable Settings: Some tools let you adjust how things look after cutting them out to get the best result.
Speed:
- Fast Processing: The tool should be able to handle images or videos quickly, which is essential if you have a lot of work to do.
- Live Preview: Some tools show you a live preview of your work so you can make changes on the spot.
Cost:
- Value for Money: Consider whether the tool is worth the price based on your budget and how much you’ll use it.
- Free vs. Paid: Some tools are free but may have limits. Paid ones often offer more features and better quality.
- Subscriptions: Some tools offer different subscription plans. Make sure to choose the one that fits your needs the best.
Part 2: How to Use AI Smart Cutout in Filmora with Ease
Editing videos can be tricky, especially when you want to separate people or objects from the background. Luckily, Filmora’s AI Smart Cutout tool makes this super easy! It helps you create unique visual effects without any trouble.
Key Features
Here are some of the features of Wondershare Filmora AI Smart Cutout.
- No More Green Screen Trouble:
With the AI Video Cutout tool, you can easily remove things from videos without using a green screen. It also has a unique setting to control how the cutout moves so that you can edit with more control. - Frame-by-Frame Perfection:
The AI helps you quickly cut out objects, and you can make small changes to each frame to get professional-looking results. - Better See-Through Options:
Filmora gives you four ways to preview your work, making it easier to make changes. Besides the normal mode, you can use Transparency Grid, Black Background, or Alpha Mode (which shows black and white) to fine-tune your edits perfectly.
How to Use it?
Now that we have seen all the features of AI Smart Cutout in Filmora, it is time to go through the step-by-step process of applying the Filmora Smart Cutout to your videos, ensuring you can take full advantage of this powerful feature, whether working on a personal project or something related to your profession.
Step 1: Import Your Video
Start by clicking “Create New Project” and importing your video clip. Once the video is imported, drag it onto the timeline to get started with editing.

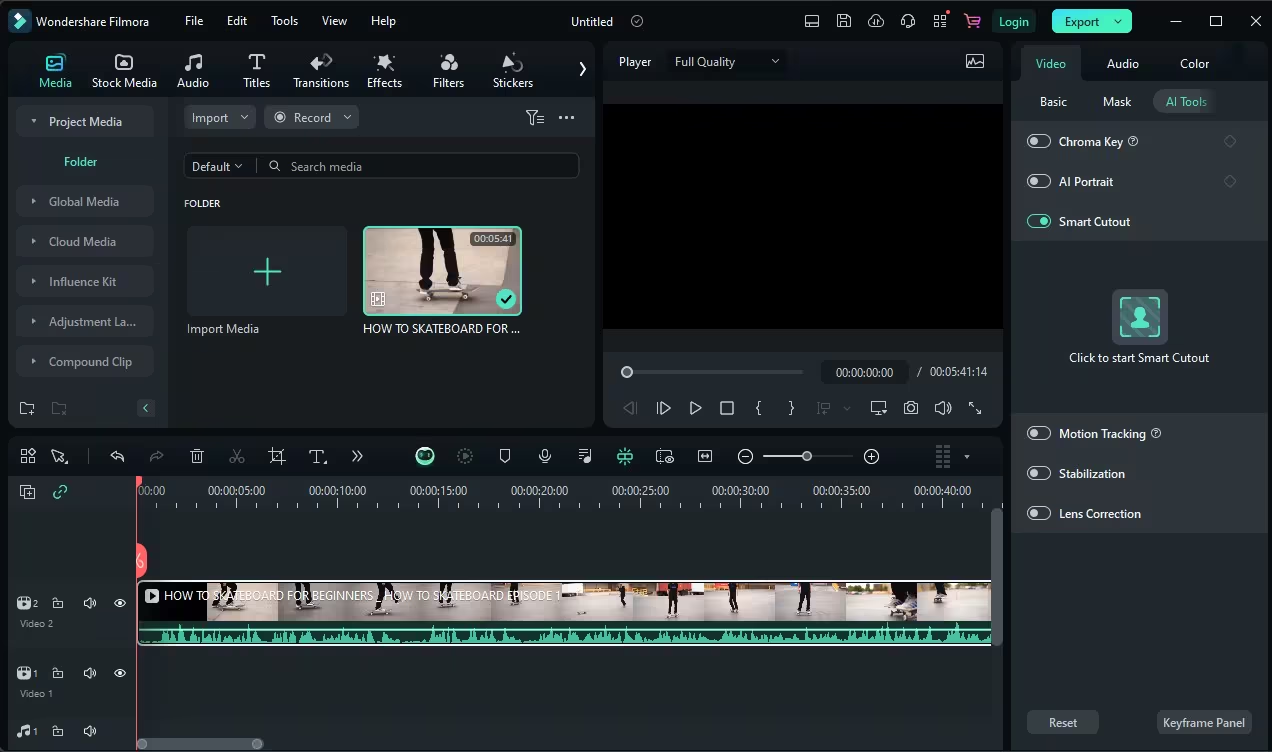
Step 2: Navigate to Smart Cutout
After importing your video, find the Smart Cutout tool under the AI Tools section on the right side of the screen. Toggle the Smart Cutout option to enable it. After enabling, click on “Click to start Smart Cutout” to begin the process.
Step 3: Highlight the Object
A new window will pop up with your video displayed. In this window, highlight the object you want to cut out from the background using your mouse. Once you’ve finished highlighting the object, click “Click to start Smart Cutout” again to continue.

Step 4: Remove the Background
After the Smart Cutout finishes processing, click the Preview Mode button and choose “Toggle Transparency Grid” to see your edits. Finally, click the Save button to save your work.
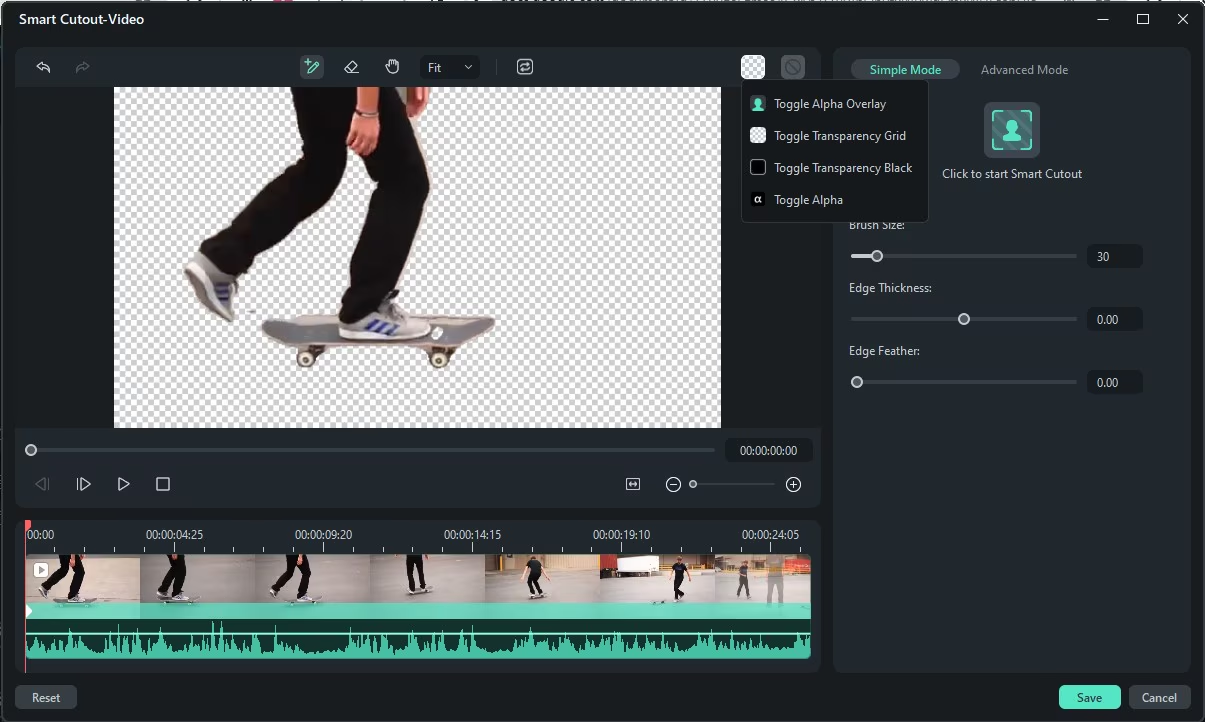
Now, you’re ready to work with a video that has a new background!
FAQ’s
Q: Can the AI smart cutout feature in Filmora accurately remove complex backgrounds?
A: Yes, the AI Smart Cutout tool is designed to handle tricky backgrounds, including fine details like hair.
Q: Is it possible to adjust the cutout after it has been processed in Filmora?
A: Absolutely! You can refine and adjust the cutout after processing to achieve better results.
Q: Does the AI smart cutout feature work well with moving subjects in videos?
A: Yes, the AI Smart Cutout can track and isolate moving objects, making it ideal for dynamic video projects.
Conclusion
Filmora’s AI Smart Cutout tool is a revolutionary feature for hobbyists and video editing professionals. It streamlines the process of removing backgrounds and creating captivating visual effects, making editing faster and more precise.
The tool’s user-friendly design and advanced options like frame-by-frame adjustments and customizable transparency ensure high-quality results with minimal effort.
If you’re producing a simple video or building a complex project, Wondershare Filmora provides a feature-rich platform to make it easier for you. It is a go-to choice for anyone looking to enhance their video creations quickly and efficiently.